Tag: climbing

  • Seven Spanish Angels: How I learned to project (boulders)

    Seven Spanish Angels: How I learned to project (boulders)

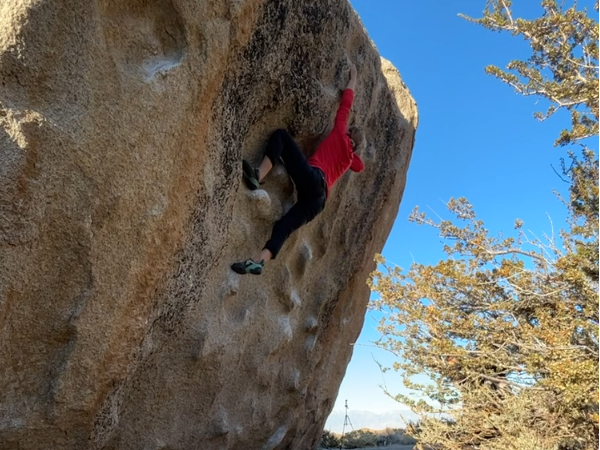
    When I started trying Seven Spanish Angels, it was my first season of outdoor bouldering. And I was starting off in the “big leagues” by picking an ultra classic highball destination like the Buttermilks.

    I sent my first v4 across town in the Happies: Solarium, which was pictured on the front of the local Bishop bouldering guidebook. And I figured the best thing I could do was to begin projecting the boulder feature don the back cover – a v6 called Seven Spanish Angels.

    boulder
    The inspo. Very simple.

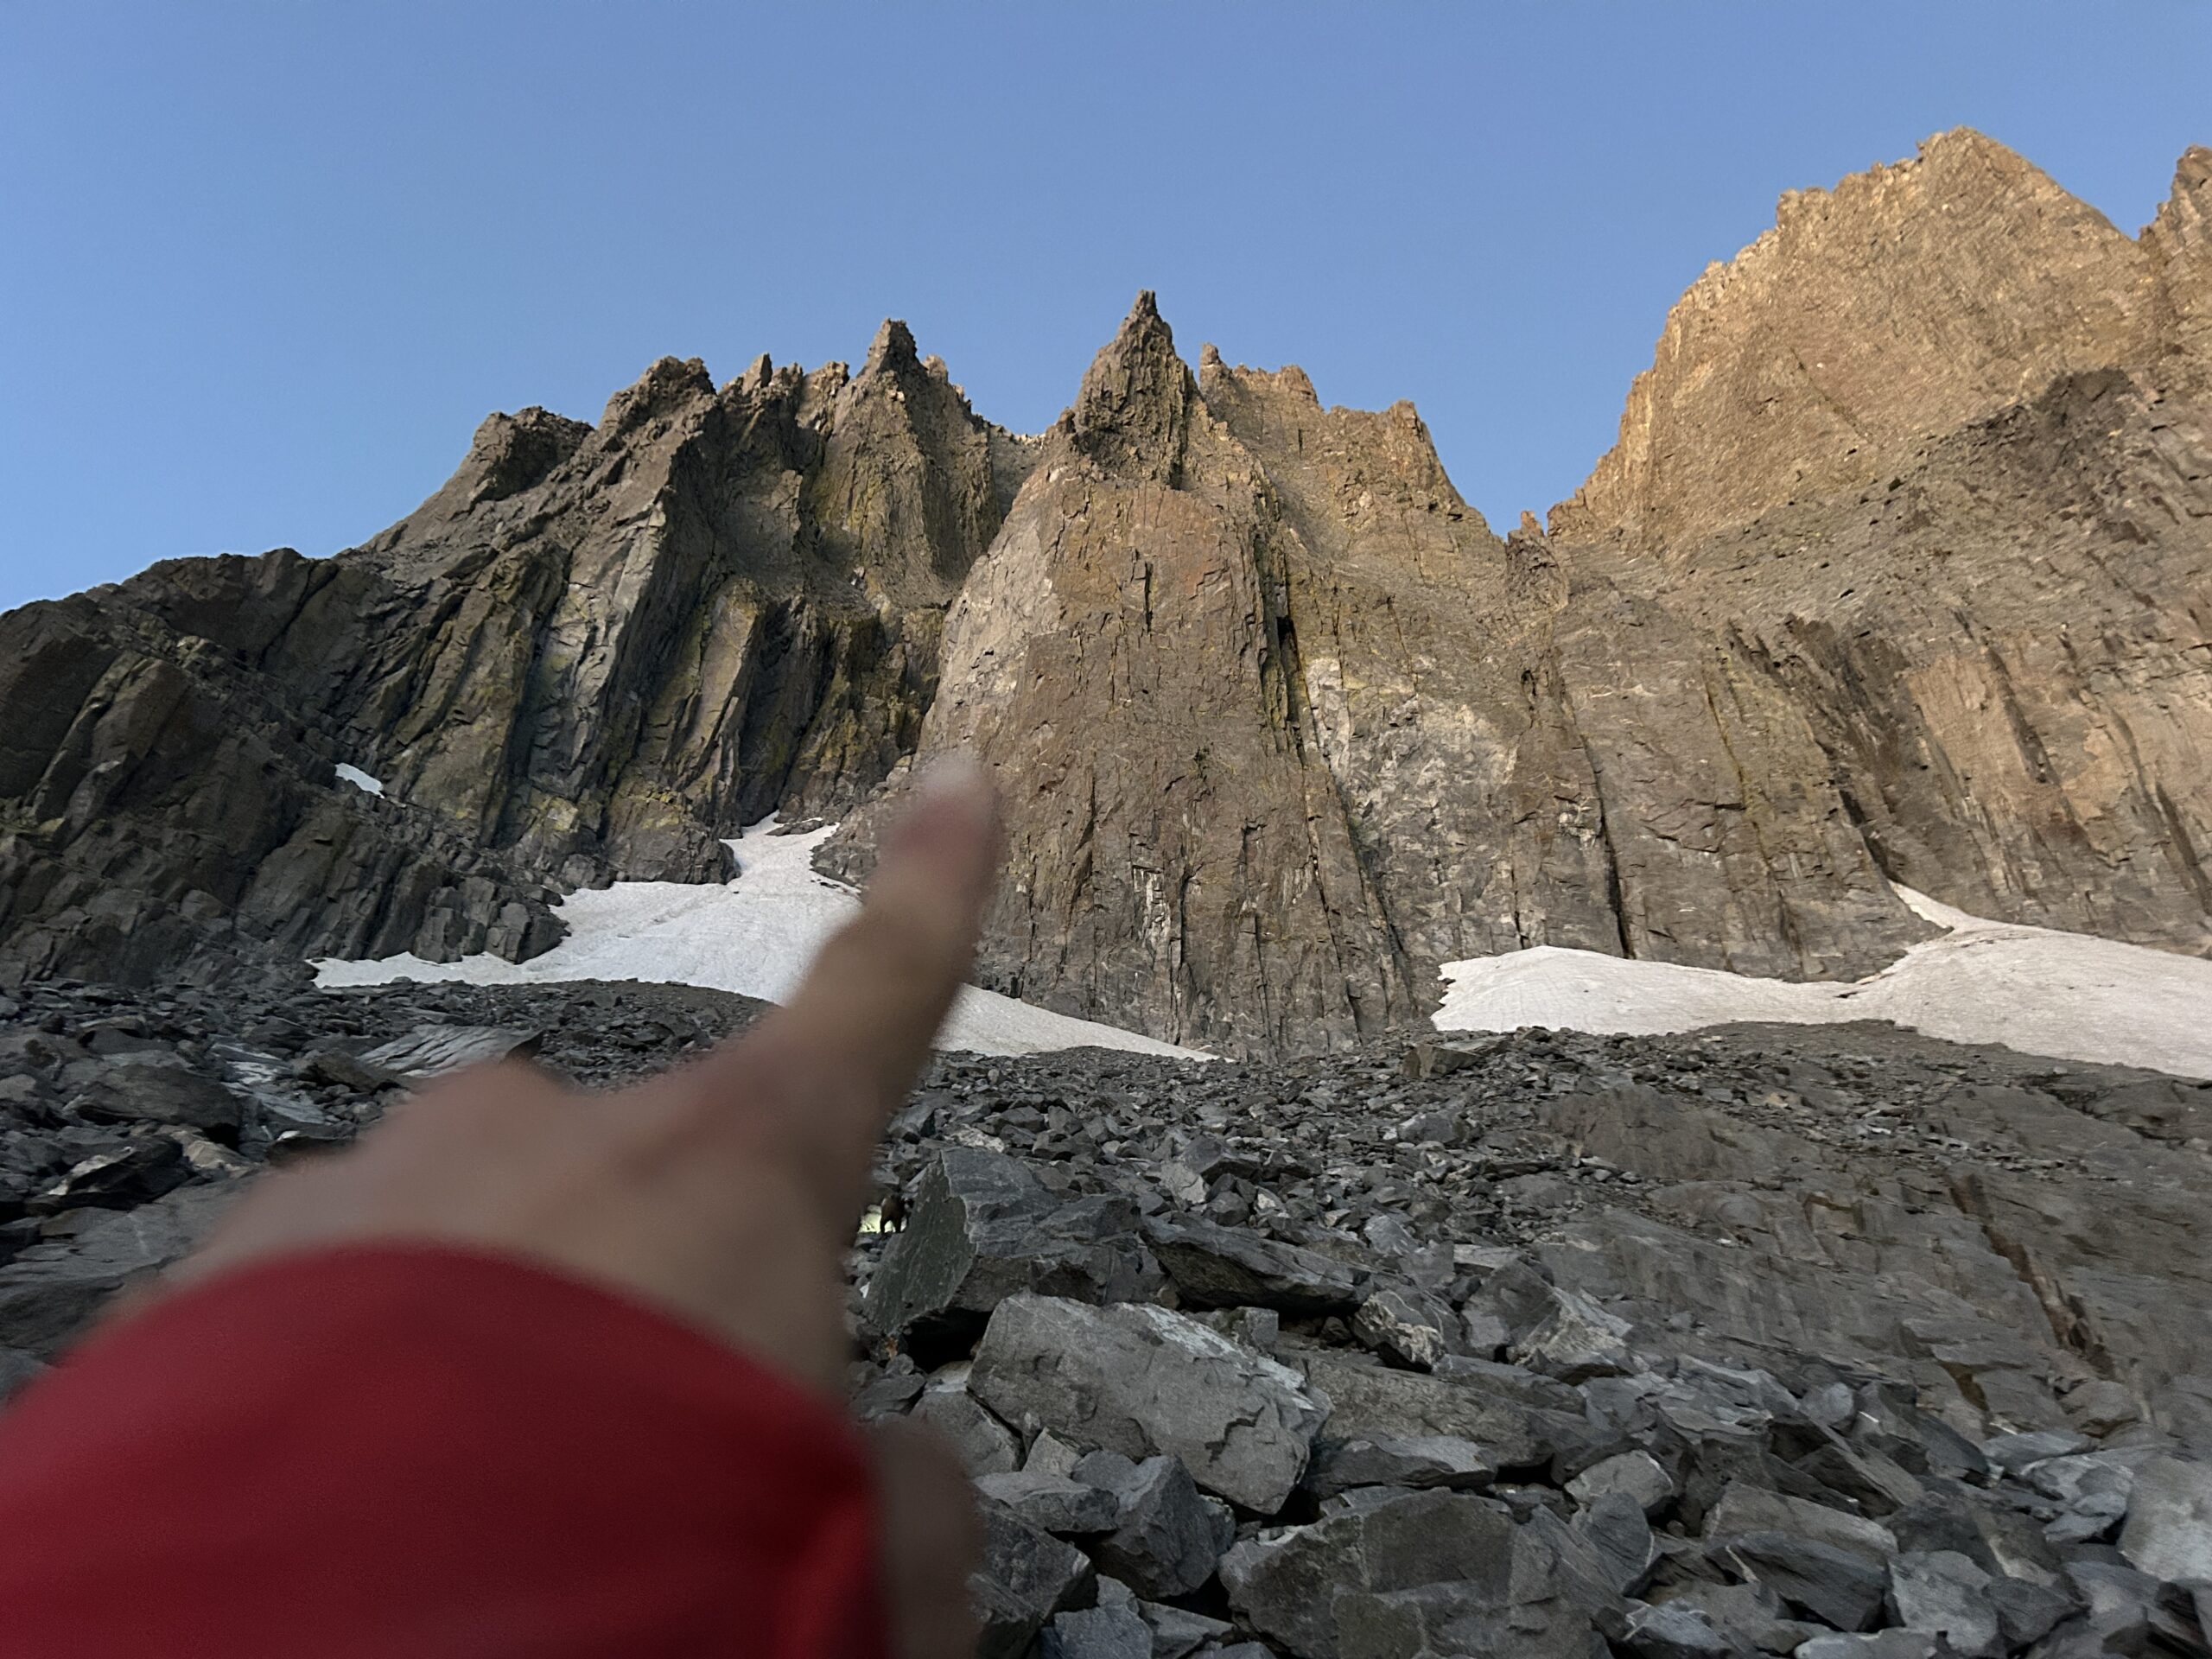
    The first time I pulled up to the boulder I was impressed by the lean. It seemed to tip out over me more than any online beta video or image could convey. I was intimidated. But I still wanted to try.

    Starting out – Expectations

    I had no clue how to approach a bouldering goal at (or above) my limit outdoors. But there is something psychologically easier about projecting a “harder” boulder. I can let go of expectations – something that usually haunts me.

    Normally if I expect to do a boulder, I find it hard to turn on that “high gear” and put in 100% effort. At the time, I was still learning to tolerate the discomfort of 100% effort, with no guarantees of success. But if I pull on in the psychological state of assuming I am not going to top it, then I can allow max effort and flow. No expectations.

    Projecting lesson: Be open minded to learn something new about the positions every time I pull on. Expect to learn something, rather than to top it. Anything to keep my mind focused on the moves to the top, rather than the top itself.

    Lately my boulder “project” has been learning to recreate that no-expectations state when a boulder is in the I’m-expecting-to-send range.

    Research – Beta

    The first day I pulled on, I had already watched a bunch of beta videos to see how other people did it. But it didn’t matter at all (yet) because I couldn’t even get past the first move or two. And there was no way to pull on in the middle (not that I knew to do that).

    Later, watching other climbers IRL or via beta videos, I realized there were a couple of main methods, and I selected the one that looked “coolest”, rather than the one that suited my body…. and I refused to try the static method… for WAY too long.

    Projecting lesson: Watch beta videos… and try all the different betas, including my own! Don’t just pick what looks cool.

    Getting ready – Working out the moves

    I returned to the boulder repeatedly, and made a little progress each time, which was inspiring for me. But it was also frustrating… how much more micro progress could I make before I’d finally be able to send?!

    I was still hyper focused on the top.

    I finally tried some different beta that was helping me make faster progress.

    Visualizing – Tolerating Discomfort

    Once I had enough sessions that I was starting to hold positions on the boulder I realized how uncomfortable the positions were, and how scary it was to move between them when it was precarious.

    I started visualizing. I’d see and feel myself on the boulder, topping out. It didn’t work. So eventually I started realizing that the discomfort made the gap between sending and stagnating untenable.

    Projecting lesson: Visualize how the moves feel, and moving through positions that may not feel comfortable. Practice moves in my head WITH the breaths I’ll take while climbing. Believe it’s possible for me. Don’t just imagine topping it.

    I addressed that by imagining how uncomfortable I would feel in each of the positions and then seeing and feeling myself continue moving even when I was uncomfortable. I imagined it daily for almost a year.

    Mental game – the crew

    The project lasted forever, in part due to picking something inappropriately difficult, and in part due to a snow season that ruined the road and kept me away for 49 weeks. That was torture.

    There was a “crew” element that I cannot downplay. Every time I made progress with a new high point, there was a crew working the boulder with me.

    Whether it was with people I knew or just met, having folks around working on the same thing was immensely helpful.

    Projecting lesson: Embrace a crew that cheers when the going gets tough. Trade beta, and encourage each other.

    At some point, I felt mentally “ready” to do the moves. But it was still hard for me, so I needed things to align.

    Sending – not the end

    When I finally sent SSA, I felt a huge wave of relief. That’s because I had been fully obsessed… and that’s because I had a one track mind, felt I was “close”, and was blocked from continued efforts by snow storm after snow storm in the ’22-’23 season.

    I was so so glad to have had the experience but also just glad it was over. I learned that it’s best to project multiple things at once, and not to put all my sessions into simply trying the proj. Some volume days and fun social sessions needed to be mixed in.

    Projecting lesson: Date multiple boulders at a time. Enjoy and relish the process rather than obsessing. Mix in non-projecting sessions where I don’t even get on the thing.

    I learned a lot from SSA. And after sending a boulder for the first time, it might still have something to teach me. I can come back and find something different each time I try a boulder. It’s about the journey, rather than the destination. I try to take that to heart now when I’m projecting boulders.

  • The most aesthetic choss factory: Temple Crag

    The most aesthetic choss factory: Temple Crag

    In August, my friend got permits for Temple crag in the Sierras and we decided to go for Sun Ribbon Arete. Before heading up there, I thought I’d want to come back for Dark Star… but honestly, it sounded quite loose and I think I’m good for now.

    I had just been dumped, and my mindset was shambolic. But I figured crying outside with friends was better than alone in the van, so I soldiered on. Don’t worry I told my climbing partner beforehand and he graciously gave me the crux… I guess it felt better having a “real” reason to cry.

    temple crag

    The route appealed to my partner and I, not just for the aesthetic nature of the line, but also because it has a natural tyrolean traverse.

    Third lake camping

    The hike in was really nice, and there was water along the way for a lot of it. That was great because I really didn’t want to carry more extra weight.

    hike

    After a little nudie dip to rinse off from the hike, we set up camp by third lake. I’d say that or second lake would be good places to camp. First lake would be a little extra commuting.

    The route finding

    We got started around 5am to give ourselves plenty of daylight, and were at the base of the route a little after sunrise. I am glad we started early becuase once we were on route I felt like we were moving slowly.

    There were a couple of pitches with good crack climbing, but they were interspersed with crumbly scrambling, wandering pitches. It was still worth doing though. I took odds and we linked whatever we could. I do tend to lose track, but I figure we did it in around 16 pitches.

    The route finding wasn’t as easy as I was expecting with it being an arete. I think that’s because the topos I found online were nearly useless on pitch lengths.

    Both topos I downloaded were different and both sucked. Normally the more detailed a topo is, the more accurate I assume it is. But these must’ve been written from memory decades later. But I’m not going back to rewrite them now that I did the route – so I guess I don’t blame them.

    Part of the adventure when I go alpine climbing is the route finding, and it was fun figuring it all out.

    The tyrolean

    tyrolean traverse

    It is always hard for me to tell altitude nausea from anxiety nausea. That day on Sun Ribbon was no different.

    I was nervous for the tyrolean because I had never done one before. And I like to have something to cling to…! But it turned out completely fine. My partner lassoed the horn after a few attempts and rigged it up. We ended up belaying each other across as well because crossing air (with no rock to cling onto) is spooky as hell.

    Looking back, I did a better job eating enough when I was getting tired. Plus I had forced down most of a dehydrated breakfast meal that morning.

    My headspace for the send

    I had just gotten dumped, but when we got to the base of the 10a pitch, it was my turn to lead. And instead of yeeting myself off the cliff because I was sad, I decided that the crux was a good distraction.

    We went for the right variation and it had about 4 feet of actual rock climbing before easing up considerably. The shitty topo was accurate here in that it indicated 2 pitons close together at the start of the pitch. They were VERY (pointlessly) close, maybe less than 3 feet apart. The crux was very reasonable.

    Some characters at the top

    summit

    That day, there were parties on several routes. Sun Ribbon is right in the middle of everything, so we could look across either way and hear rockfall.

    Our good friends were on Venusian Blind, a guided party was on Moon Goddess, and another party was on Dark Star. Most of the rockfall came from Dark Star and it was comically (terrifyingly) chaotic.

    We heard so much rockfall that it felt like we were getting shot at. During the entire route, we pulled off ONE small rock. From the sound of it, Sun Ribbon must be the least chossy. Or maybe things just echo because Sun Ribbon is in the middle of everything else.

    We listened to the Dark Star party having conflicts throughout the day and when we reached the top, we met that party. One of the guys was bragging that he had now done all the routes at Temple, and explaining to us where Mt. Sill was (he was, in fact, not pointing at Mt. Sill).

    He was mansplaining to both me and my partner (a man), so I can’t chalk this one up to being a woman in the backcountry.

    Going down

    I am glad we had daylight for our descent. After the topout, we hiked down following cairns easily. Then we did the rappel, and hiked down the pass. Towards the bottom, as we got near the main trail, we ended up veering a bit left in the hallway (towards third lake) when we should’ve gone a bit right (towards second).

    It was one of the more sketchy things I’ve ever done and looking back I would revise my decision making. I would have retreated to find a better way. Lots of big blocks were breaking loose upon weighting them…. and I did end up losing a #1 doing some questionable glissading. I lived and learned, gratefully. And luckily we still had daylight.

    Our Venusian Blind friends were descending after nightfall, and they started radioing us for beta consistently because of how cryptic the descent was without light.

    They kept waking me up, but there wasn’t much we could tell them since we didn’t have their location. My partner’s Rocky Talkie died conveniently when our friends started relying heavily on radioing us for beta LOL.

    “Keep the big boulder to your right” doesn’t really help that much when I have no clue which big boulder they’re looking at.

    It reminded me of the importance of having a Gaia map downloaded at the very least. And a bivy sack. There was some concern they might get benighted… and what a terrible place that would’ve been to hunker down (rockfall hazard). But they made it back around midnight.

    Overall we spent ~15 hours camp to camp. That’s including a nice lunch lounge on route, some summit selfies, and a couple other leisurely rests at scenic spots.

    The nice thing is that we had great views of the lakes and mountains the whole time. And there were some legendary ledges to chill on 🙂 A good time with my homie.

  • Full value, fancy, alpine climbing in the Bugaboos

    Full value, fancy, alpine climbing in the Bugaboos

    The inspo

    After climbing Mt. Whitney last year in a group of four, two of us hatched a plan to go even bigger this year.

    Personally the Bugaboos has been on my mind since I saw Reel Rock’s Boys in the Bugs and got a lil celeb crush on Will Stanhope. My friend fell for the Bugs after leafing through pictures in the guidebook. So we agreed to make the trip.

    kain hut

    We planned to spend a week in July at the Kain Hut. The target was some combo of 1) the NE Ridge of Bugaboo Spire, 2) Surf’s Up on Snowpatch, 3) the Snowpatch Route of Snowpatch Spire, and 4) the West Ridge of Pigeon Spire. We toyed with a few others, but weren’t sure how many climbing days we’d have because of weather and energy.

    The appeal wasn’t just aesthetic. The challenge drew me in, because it was so big and I knew it would be challenging by using all of my skills (and require me to learn new skills). I had to learn to cross a glacier properly for starters. And many of the routes are notorious for benighting climbers new to the area, and it felt like a good test of my ability.

    The prep

    My bugs partner and I took a one day snow travel course locally, which was definitely not enough for me to feel comfortable. I had one other day of snow travel after that, when I attempted Shasta. I had bad weather, was alone, was unfamiliar with the weather there… and everyone else on the mountain was bailing, so I felt like it wasn’t worth it. It was also very spur of the moment. So I had extremely limited snow travel experience. And in the Bugaboos I ended up feeling like it was not enough for my comfort level.

    The approach

    We left our cars in the lot with chicken wire surrounding them to reduce the impact of curious porcupines.

    car with chickenwire

    Hiking in was a wet staircase straight up with a heavy (for me) pack. We quickly left the forest and arrived in a rocky alpine environment.

    At the time I was unsure if I would get all the days in the hut or if I would have to hike back out to get a tent to link my disparate Kain hut nights. I ended up getting them all. That was stressful, but it worked out when I got there and the hut keeper let me stay. I am pretty sure he pocketed the cash and didn’t actually let anyone know I was still there. But either way, I got to stay, so I was happy.

    Climbing

    My Bugs partner and I hadn’t really roped up that much, let alone for anything this big. We did really well considering it was our first (ish) time roping up for something this big.

    The first day we had very marginal weather so we decided to go for Pigeon, via the BS col. The rain and visibility worsened quite a bit as we made our way up the col. On top of that, there were a lot of rocks coming down. It was rather scary. We bailed due to weather, visibility, and safety. The BS col was already out, we would have to go around Snowpatch for the rest of our climbs, which meant longer days (and way more rappelling).

    rescue helicopter

    The second day it poured rain the entire day so we did not attempt to climb. We did, however, assist with a rescue. A climber had fallen on his hike out, and fell about 100 feet. He had to be long-lined out via helicopter, and we helped carry items to him. That was a pretty jarring experience to have right before our big send. We heard later that he ended up being alright.

    The third day, we woke up at 2am for the NE Ridge of Bugaboo Spire. We left right before a guided party, but we got lost on the approach. But after losing the cairns and wading through choss, we saw their headlamps and got back on trail. We started had steep snow to the base of the BC col and then decided to solo the 4 pitches to the base of the route. Partway through that, my partner requested a rope, so we pitched out the last pitch. It was dark and perhaps we were off the optimal path, but I felt it was airy and more than 4th class.

    When we got to the top of the col, we were a little jarred, so we rested and pitched out the rest of the approach. I think it was a good decision given how the 4 pitches went. But realistically, in retrospect, it was completely unnecessary.

    follower on p1

    At the base of the route, the guided party went first, and a pair of Colorado soloers, both called “Chris” went second. We were third, and two parties had lined up behind us. My partner kindly gave me P1 and I promptly whipped. I thought I was past the crux, and I was in a wet crack. I remember thinking my toe hurts from the jam. I took that as a sign my toe jam was secure. The next thing I knew I was falling. I was rattled, but my gear held. I think this happened because I didn’t eat enough and was shaky, and also because I felt rushed.

    We continued up, and I felt shakier and shakier until finally my partner suggested I eat something. I did and I was pretty quickly cured of the shakiness. Note to self – eat enough….!

    The climbing was all pretty friendly, exposed, beautiful, high quality rock. But the climbing was a very small percentage of our day.

    Once we summited, we had to figure out how to descend. We never really felt we could take a break and eat or sit down, which was a change from the alpine routes I am accustomed to here in the Sierra.

    We didn’t feel comfortable doing techy 4th class scrambling with a ton of exposure, so we pitched out or simuled all of the ridge scrambling. Looking back I think we could have simuled more but I am happy with our risk related decision making.

    ice fall rappels around snowpatch spire

    The way down was constant switching from rapping to simuling to rapping to pitching etc etc. It was lengthy but we could see the guided party off in the distance for part of it and that helped.

    Then we walked back down to the BS col, and switched back to glacier travel to take the snowfall raps back to the Kain hut. It added another 8 raps, and 2 glacier crossings to our day, plus a ton of loose skree to descend, and the mental effort of route finding through all that.

    But we made it back to the hut in 18:40, which was great considering that we had to go around and couldn’t use the BS col.

    The fourth day, we rested. And the fifth day we went up Eastpost spire, a fourth class scramble, to get a nice angle on Bugaboo Spire. I was glad we didn’t have to leave too quickly. The sixth day we hiked out.

    It made sense for us not to attempt another big route with iffy weather and lower energy than before. We snagged our big objective, learned a lot, and left with stoke to spare. I will be back for Snowpatch someday certainly.

    Basking

    top of east post spire selfie

    At the top of Eastpost spire, we basked. And then back in Radium Hot Springs, we basked. Now that I’ve had a big trip with basking built in, I will never skip it! Basking is the best, and honestly I think it is what prevented a painful comedown from such a high-high, which usually debilitates me. Basking is the solution.

    Lessons Learned

    • Always bring extra food, especially PB.
    • Eat MORE, fuel properly even if I’m not hungry. Count calories!
    • Mind transitions. Don’t take off crampons when it’s not necessary or vice versa. I think this takeaway is amplified for me because of my glacier travel inexperience.
    • Book the Kain hut far in advance for more than a few days to avoid getting rained out.
    • Do more squats.
    • Bring more layers.
    • Always bask.
    • Sexting on the inReach is fun, but if worst comes to worst, would be bleak and embarrassing to be found like that. It may not be worth it.
  • Mt. Emerson

    Mt. Emerson

    “The civility of no race can be perfect whilst another race is degraded.” -Ralph Waldo Emerson

    Mt. Emerson is a peak on the Bishop skyline that sat on my to-do list for a while. I guess I didn’t have a partner. Or maybe I was intimidated by being in the backcountry alone. But earlier this year, a Montana-based friend made a climbing partner intro that helped me catch some stoke.

    The Southeast Face (aka the Waterfall route) is a 5.4 scramble and local classic and I was pretty unsure how long it would take. The car to car times in various trip reports ranged from a 1-2 hour trail run to overnight epics. I was pretty confident this would be less than a full day for us, but the mountain project page was evidently designed to reduce the number of SAR trips required.

    Totally valid, but it made it harder to calibrate. I gave us anywhere between 5 hours and 10 hours for a leisurely jaunt. It ended up taking 7, with a half hour detour for water and two long snack breaks.

    The way there

    A scenic view showcasing a snow-covered mountainous landscape with a stream flowing through rocky terrain, surrounded by patches of snow and evergreen trees in the Eastern Sierra Nevada Mountains. Watering hole near Mt. Emerson and Loch Leven outside of Bishop, CA.
    it seemed a little hard to access the water at first, but we found a gap between the snow and rock where we could access it

    We brought helmets and approach shoes. And we brought water filters. We ended up passing the last stream crossing before the cutoff without realizing it. That meant that we had to go out of our way an extra 30-40 minutes to get water. It added to our day, but the place we got water was pretty nice.

    We got to the North Lake parking lot around 5am, and started hiking just as the sun was coming up. It’s a short approach through the forest, with a few creek crossings, up to the more rocky climber’s trail. The approach trail was pretty, and I had done it before on a hike up to Loch Leven.

    At some point, the route becomes visible and we exited the trail to go cross country. Lots of gpx coordinate links are available online, but I did not record ours. The base of the climb was an obvious crack. And I regularly complain when a guidebook refers to something as “obvious”, so this was really very clear.

    A climber ascending a rocky chimney on a mountain, showcasing challenging granite formations and rugged terrain near Bishop, CA.
    first pitch, obvious crack

    We hiked up to the base and the start was probably the “crux”. It had maybe a maximum of two 5.4 moves within the first few “pitches”. The route finding was pretty straightforward by Sierra alpine standards. It was mid-June, and we encountered only one snow field in the route (at least I think it was on the route). We were easily able to dodge it by gaining the ridgeline via an earlier than normal point (I think), which was chossy.

    The climbing was cardio for me, especially as we climbed to higher and higher altitudes. But the moves were all very reasonable and maybe one move was exposed. I definitely wouldn’t want to pitch this out for any reason. If I were bringing rope, I’d bring like a few pieces (nuts?) and the shortest rope I own.

    A climber standing on a ridge line near the summit with panoramic views of snow-capped mountains and clear blue skies in the Eastern Sierra Nevada Mountains outside of Bishop, CA.
    getting close to the summit

    Halfway (summit)

    A climber sitting on a rock summit  (Mt. Emerson) against a backdrop of blue sky and clouds, wearing a helmet and sunglasses in the Eastern Sierra Nevada Mountains.
    me on the summit block, (photo creds Nate)

    The summit was beautiful and offered clear views of so many peaks, including Mt. Humphreys, Checkered Demon, Mt. Darwin, and more. I ticked this climb with more additions to the to-do list, rather than less…. classic.

    Scenic view from the summit of Mt. Emerson, featuring rocky mountain ridges, patches of snow, and a bright blue sky with wispy clouds in the Eastern Sierra Nevada Mountains.
    the view of Checkered Demon and Mt. Humphreys from the summit of Mt. Emerson

    At the top we ate lunch and had a little wind. The coolest climbing is up high, gaining the summit block. There are airy, but easy, moves on very solid granite. The views of Paiute Crags are trippy, with their marbleized coloring… it reminded me of cinnamon bread or tie dye or something.

    A panoramic view from Mt. Emerson, showcasing the rugged Paiute Crags under a clear blue sky in the Eastern Sierra Nevada Mountains.
    delicious pastry looking Paiute Crags

    The plants up there were pretty interesting too… I found myself stopping to take pics (and not just because I was out of breath LOL). Maybe I’m easily entertained, but my own backyard never fails to impress me.

    The way back

    We found the descent pretty straightforward, despite trip reports indicating that it was not. Very ledgy, and lots of loose skree.

    A person in a red jacket walking across a snow-covered slope in a mountainous terrain with rocky hills and sparse vegetation under a clear blue sky in the Eastern Sierra Nevada Mountains. She is clearly not glissading yet.
    getting ready to glissade. (photo creds Nate)

    We bounced our way down until we hit a snow patch. We didn’t bring any ice axes, but decided to glissade anyway (with rocks). Maybe not my best decision, but it was fine and much quicker than walking down the loose stuff.

    I was pretty happy to hit solid ground on the trail. We got eyes on Loch Leven, where folks were fishing, and decided to stop for snacks and water.

    The serene Loch Leven lake surrounded by rocky mountains and slopes covered in snow, with a clear blue sky and wispy clouds above in the Eastern Sierra Nevada Mountains.
    back to Loch Leven

    It occurred to me later that we summited Mt. Emerson on the same day as the politically active nationwide were demonstrating against the ICE kidnappings.

    The peak is named for Ralph Waldo Emerson, who has his own controversy, but who famously said “The civility of no race can be perfect whilst another race is degraded.” and I thought that was appropriate for the day.

  • Dirtbagging. Living the cozy #crvlife

    Dirtbagging. Living the cozy #crvlife

    car with mountains

    For the better part of the past 1 year, I’ve been living in my 2011 Honda CRV. I’m a climbing dirtbag. At the start of my dirtbag era, I kept my apartment, because I thought this era would quickly end. But I have quickly made it a comfortable lifestyle. After not visiting the apartment for months at a time, I decided to get rid of the home base all together and opt for a PO Box instead. The car is pretty cozy, and when I did visit the apartment I suffered from terrible insomnia. In retrospect, the choice was obvious, but there was lots of turmoil involved in making the decision, which I addressed in a post on TinyBuddha. Here, I’m focusing on how I managed to get so cozy living the #crvlife.

    Building out the CRV:

    1. Remove Seats: This era of CRV has back seats that do not fold flat. I took out the passenger side and attached middle seat to have space for my bed platform. Initially I left them in, but its much better without them in terms of storage and stability.
      • It’s pretty straightforward to remove the seats once you pop off the plastic bolt covers. There are 4 bolts and you need a socket wrench to undo them. The seats are quite heavy also. I saved the bolts and used them to attach my sleeping platform.
    2. Sleeping setup: This is basically the only “build” I actually did. I sleep with my head toward the front of the car and prop the passenger seat forward when I sleep so I can dangle my feet.
      • Materials:
        • sheet of plywood – standard size, composite because it’s less splintery
        • 4×4 – 12′
        • 1×1 – 12′
        • package of screws & corresponding bit
        • drill
        • L shaped metal brackets
        • straight metal brackets
        • wood glue
        • the bolts I unscrewed
        • socket wrench
      • Platform: I had home depot cut my plywood to size. For me that was 70″ long and 26″ wide. When I got it home, I cut a diagonal corner for the back passenger side of the platform, so it could be propped up on the lip of the wheel well (this is one “leg” of the bed).
      • Framing: For sturdiness, I added two strips of 1×1 framing along each long side of the bed platform. I attached it with screws and wood glue.
      • Front Legs: The front “legs” were made from one solid block of wood. I used 24″ cuts of my 4×4 and stacked them on top of one another, attaching them together with straight metal brackets and wood glue to one another. Then I attached them to the car with the L brackets, straight brackets, and bolts from the seat removal. This block of wood is not at the end of the plywood, it’s around a foot or so in from the edge, and supports the shoulder area of the sleeping platform. I attached the platform to the front “legs” with L brackets and screws. and attaches to the 1×1 framing with L brackets.
      • Back Legs: The back “legs” are each done pretty differently. The outside edge rests on top of the car itself. For me, that provided the most snug fit, and most space underneath the platform for storage. For the other back leg, I used the remainder of the 4×4 piece, it’s just under 12″. I attached it to the framing using L brackets. It’s very sturdy and falls around mid-calf, rather than at the very back of the platform. That allows me access to the things under it more conveniently.
      • Comfiness: I use a 6′ piece of 4″ upholstery foam from JoAnn fabric as my mattress. I put a sleeping pad on top of that for warmth. Then I use a 0 F sleeping bag and a wool blanket on top of that in winter.
    3. Electricity & warmth: I use a Jackery and a heating pad when it gets below 30 F. I just use a small battery to charge my phone at night and I get about 2 nights off a charge. I have a solar lantern for when it gets dark and I want to read. But typically I sleep when the sun says it’s time.
    4. Curtains: I don’t use them! I can cover a window or two if needed with a towel, but I normally camp in rural places rather than in town. Plus, without curtains you can see the stars better 🙂
    5. Storage: A roof rack is in my future. But for now it all fits inside. Food in the driver’s side back footwell. Crash pad next to bed, clothing in bags under that. Climbing & camping gear under the bed. Toiletries, coats, water and electronics under the passenger back footwell. And miscellaneous in front seat.
    parked somewhere good

    Living on the Road:

    Budgeting and Finance:

    1. Frugal Living: I keep expenses low. Most of my costs are health insurance and food. Climbing is free.
    2. Food: I use the Eureka Spark single burner camp stove and I cook a lot of simple, repetitive things. Protein bread + avo + egg = chef’s kiss. One pro of living in your car in winter is that you don’t need to buy ice or anything if it’s cold out and food stays good for a long time.
    3. Passes and Permits: I normally sleep on BLM land, which I find via Gaia, but I also have a national parks pass.

    Hygiene and Comfort:

    laundry
    1. Shower Solutions: It depends on location
      • I belong to Planet Fitness, which works great in bigger cities. Plus you can sleep in the parking lot if needed.
      • Hostels and gas stations often have showers for a fee, which is convenient.
      • An occassional hotel night comes in handy to recharge, refill, and shower all at once.
      • In between showers, I jump in lakes/rivers.
      • If I’m not showering that day, I wipe down sweaty areas with antibacterial wipes (not baby wipes). Antibacterial wipes keep bacteria levels down on the skin, which is what causes BO.
    2. Laundry: Laundromats can be a great place to get wifi and stay warm if it’s chilly on a winter evening.

    Safety and Security:

    1. Knowledge: I try to stay in places I know and if I’m going somewhere new I arrive in daylight and camp with friends if possible. I always give myself permission to leave an area at any point and I try to have a backup plan if I’m sleeping somewhere I’ve never been.
    2. Vehicle Maintenance: I get regular car checkups. That said, I’ve popped a couple tires on dirt roads at this point, so it helps to be prepared. I check to make sure my spare is inflated, plus I’m a AAA member, and I have a portable air pump and some patching spray for temporary fixes.
    3. Security: I don’t keep valuables in my car, but I do always lock my car and keep things out of sight.

    So far, the #crvlife has been good to me. It’s hard to believe a year passed this quickly. It has made me realize how little I really need to feel at home and happy.

  • The carbon footprint of an existential crisis

    The carbon footprint of an existential crisis

    I was laid off earlier this year, along with 60%+ of the company, from a job I enjoyed but found chaotic. The day I was laid off, I added sticky notes to my wall with ideas on how to spend my time. Then I got in the car and drove 5 hours north to Mammoth Lakes, CA to go skiing. I realized that I wanted to use the time to be outside and explore personal interests, while I job hunted for a better fit.

    I still wanted structure though, so I built my own personal outdoor curriculum: Single Pitch Instructor certification, Wilderness First Responder cert, plus a climate change fellowship with Terra.do.

    I also traveled and climbed. For my first major roadtrip I drove from LA to Texas for an AAC Volunteer Summit at Hueco Tanks Rock Ranch. Then I briefly came back to LA before beginning another road trip to Canada. All in my little 2011 Honda CRV. I built out the back of my car into the coziest car camping setup I could build. I feel very at home there, despite my VA plates indicating that I am quite far from home here on the West Coast.

    There were a lot of ups and downs along the way, and I’m still a little up and a little down about it even after the fact. Regardless, I learned a lot trying to figure out where I fit in, in life, in climbing, and in my career, all while living out of my car. Big takeaways:

    1. I prefer to avoid crowds
    2. I spend a lot of time in front of a computer

    I want to immortalize this time in my car by writing down my experiences as some kind of public diary with the target audience of future me.

    My trip spanned desert and alpine environments, and I saw (at least) 14 National Parks, 2 National Monuments, 15 National Forests, 2 State Parks, countless wilderness and conservation areas. I truthfully lost count. All this I did in a car that takes 89.

    So is it ironic that I did this at a time when I was diving deeper into climate change? What was my carbon footprint on this trip and was it more or less than my usual apartment life? According to carbonfootprint.com my make/model/year emitted 2.1 metric tons of carbon for the 3 months I lived out of my car (~7,500 miles). Usually, my life emits around 13,148 lbs of CO2 according to the EPA calculator and that’s all inclusive, including my driving/traveling. That means that for 3 months, it would’ve been about 3,287 lbs CO2 if I had stayed home.

    While I’m a bit down that my impact was so much greater during the summer roadtrip, I think there is value in learning too. It’s hard to figure out the appropriate tradeoffs – how much personal growth and learning is 1 ton of CO2 worth? And who gets to decide? Of course, I remained committed to some of the individual actions I have already incorporated into my life: practicing vegetarianism, recycling, using reusable containers, reducing my consumerism. But the personal journey I went on this summer also made me more keen to get involved on a systemic level, and to make climate a stakeholder in organizational decisions I have the privilege to be part of. I’m doing it imperfectly, but I’m showing up, so I can be optimistic about that.

    Road trip 1: LA <> Texas

    Road trip 2: LA <> Canada